No edit summary |
No edit summary |
||
| Line 26: | Line 26: | ||
==Walkthrough== |
==Walkthrough== |
||
[[File:(7 ~ 3) Dragon's Dogma ~ Witch Hunt Hero Trophy Guide|thumb|300px|right|Witch Hunt ~ Video Walkthrough]] |
[[File:(7 ~ 3) Dragon's Dogma ~ Witch Hunt Hero Trophy Guide|thumb|300px|right|Witch Hunt ~ Video Walkthrough]] |
||
| − | + | Provided [[Lost and Found]] was completed earlier, this quest becomes available when the [[Arisen]] returns from the [[Duke's Demesne]] after completing [[Come to Court]]. |
|
| − | + | When you pass by the fountain in [[Fountain Square]] you can hear three merchants talking to each other about a hunting party going after a witch... which is, of course, [[Selene]]. The quest will automatically be registered in your questlog when they have finished talking. One of the merchants, [[Brice]], has more information. |
|
===Seek Out Selene=== |
===Seek Out Selene=== |
||
| Line 38: | Line 38: | ||
===Defeat the Golem=== |
===Defeat the Golem=== |
||
| − | If youv've never faced a Golem then see the [[Golem]] page for tactics. In short, the Golem is impervious to all type of attacks except for the glowing discs on its body. These disks can only damaged by |
+ | If youv've never faced a Golem, then see the [[Golem]] page for tactics. In short, the Golem is impervious to all type of attacks except for the glowing discs on its body. These disks can only damaged by physical attacks or high level magick spells with a physical component such as [[Bolide]] or [[Gicel]], however, its magick resistance is extremely high. Using multiple arrow skills such as [[Fivefold Flurry]] or [[Tenfold Flurry]] on the disks is extremely effective. The white glowing disk will stun the golem, allowing you to seek out the disks without it trying to attack you, but it will turn berserk afterwards. |
Dealing with the Golem will trigger the next part of the quest. The camera will pan towards where you need to go. |
Dealing with the Golem will trigger the next part of the quest. The camera will pan towards where you need to go. |
||
| Line 46: | Line 46: | ||
===Quest Successful=== |
===Quest Successful=== |
||
| − | After the cutscene the quest is completed and you are awarded the |
+ | After the cutscene the quest is completed and you are awarded the Mage's staff [[Favored Canopy]] which, at this point in the game, is quite powerful. There are multiple chests here containing loot. The large chest next to the gravestone contains a [[Ferrystone]]. There are also three [[King Bay Leaf|King Bay Leaves]] in the area. Make note of this place before leaving as there is an important sidequest to be gotten later in the game called [[The Dragon's Tongue]]. |
After leaving the [[Witchwood]] Selene will move to [[Your House]] in [[Cassardis]]. |
After leaving the [[Witchwood]] Selene will move to [[Your House]] in [[Cassardis]]. |
||
==Loot== |
==Loot== |
||
| − | There are |
+ | There are three treasure chests in the vicinity where you encounter Selene and Sofiah. Two are directly beside them, the other one behind the large tree. The [[King Bay Leaf|King Bay Leaves]] are also materials for a quest (you will need five for [[A Fabled Dream]], obtained at the notice board at the Alehouse in Gran Soren); these will regenerate after seven game days. |
See [[Witchwood]] for all treasures in this area. |
See [[Witchwood]] for all treasures in this area. |
||
| Line 57: | Line 57: | ||
==Notes== |
==Notes== |
||
*The quest [http://dragonsdogma.wikia.com/wiki/Lost_and_Found Lost and Found] is a prerequisite. Without it, Witch Hunt will not be available. |
*The quest [http://dragonsdogma.wikia.com/wiki/Lost_and_Found Lost and Found] is a prerequisite. Without it, Witch Hunt will not be available. |
||
| − | *The quest is cancelled when completing [[The Final Battle]], however, |
+ | *The quest is cancelled when completing [[The Final Battle]], however, Selene will be alive, at her Hut. |
| − | *Fighting the |
+ | *Fighting the Golem can be tough if you don't know what you're doing. Be sure to aim only at glowing orbs on its body. Destroying the one that glows the brightest will cause it to temporarily stop moving, followed by a powerful rage state. |
==Gallery== |
==Gallery== |
||
<gallery> |
<gallery> |
||
Revision as of 20:05, 24 November 2014
Witch Hunt is a quest available in Dragon's Dogma.
Objective
"Rumors that the "hexer" of the Witchwood is in league with the dragon are sure to incite violence unless action is taken."
Details
A quest obtained by eavesdropping on the conversation of Brice and two other merchants in the Fountain Square about a witch in the woods, who is believed to be the cause of the return of the dragon. A search party has been dispatched into the Witchwood to find her. You must go to the Witchwood to ensure her safety. This Quest becomes available after completing Come to Court.
Seek Out Selene
- Selene could face retribution for her perceived ill deeds. Make for the Witchwood and see to her safety.
Defeat the Golem
- The furor roused a massive, powerful golem. Quiet it once more.
Pursue Selene
- You defeated the golem and opened a path into the Witchwood. Delve in and follow Selene's trail.
Quest Successful
- You quelled the riot and saw Selene safely to Cassardis. Quest reward received.
Walkthrough

(7 ~ 3) Dragon's Dogma ~ Witch Hunt Hero Trophy Guide
Witch Hunt ~ Video Walkthrough
Provided Lost and Found was completed earlier, this quest becomes available when the Arisen returns from the Duke's Demesne after completing Come to Court.
When you pass by the fountain in Fountain Square you can hear three merchants talking to each other about a hunting party going after a witch... which is, of course, Selene. The quest will automatically be registered in your questlog when they have finished talking. One of the merchants, Brice, has more information.
Seek Out Selene
In order to rescue Selene you must travel to the Witchwood. To reach the woods take the left path on Manamia Trail past The Encampment up into the mountains. Keep to the left path until you see a fog rising. This is the Witchwood.
Head into the Witchwood over the creek and keep to the left path while the road forks twice until you see a fallen tree acting as a make shift bridge. Climb up the rocks on the left and cross the tree and head further east. Continue on this path to find the Witch's cottage.
When you reach the clearing near the cottage a cutscene will play of the hunting party trying to break into the house. Approach the cottage for another cutscene where the hunting party is disturbed by a Golem. Prepare for battle.
Defeat the Golem
If youv've never faced a Golem, then see the Golem page for tactics. In short, the Golem is impervious to all type of attacks except for the glowing discs on its body. These disks can only damaged by physical attacks or high level magick spells with a physical component such as Bolide or Gicel, however, its magick resistance is extremely high. Using multiple arrow skills such as Fivefold Flurry or Tenfold Flurry on the disks is extremely effective. The white glowing disk will stun the golem, allowing you to seek out the disks without it trying to attack you, but it will turn berserk afterwards.
Dealing with the Golem will trigger the next part of the quest. The camera will pan towards where you need to go.
Pursue Selene
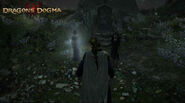
The Golem was blocking the path into the deepest path of the Witchwood in your earlier visits. Now that it has been defeated you can venture further in. You will enter a cavernous path whirling deep down. When you exit you will enter a new part of the witchwood. Follow the path to the end to reach a gravestone where you will find both Selene and an unknown woman called Sofiah. Speak with her.
Quest Successful
After the cutscene the quest is completed and you are awarded the Mage's staff Favored Canopy which, at this point in the game, is quite powerful. There are multiple chests here containing loot. The large chest next to the gravestone contains a Ferrystone. There are also three King Bay Leaves in the area. Make note of this place before leaving as there is an important sidequest to be gotten later in the game called The Dragon's Tongue.
After leaving the Witchwood Selene will move to Your House in Cassardis.
Loot
There are three treasure chests in the vicinity where you encounter Selene and Sofiah. Two are directly beside them, the other one behind the large tree. The King Bay Leaves are also materials for a quest (you will need five for A Fabled Dream, obtained at the notice board at the Alehouse in Gran Soren); these will regenerate after seven game days.
See Witchwood for all treasures in this area.
Notes
- The quest Lost and Found is a prerequisite. Without it, Witch Hunt will not be available.
- The quest is cancelled when completing The Final Battle, however, Selene will be alive, at her Hut.
- Fighting the Golem can be tough if you don't know what you're doing. Be sure to aim only at glowing orbs on its body. Destroying the one that glows the brightest will cause it to temporarily stop moving, followed by a powerful rage state.

